Today, I’ll show you how easy is to install, configure Runecast Analyzer (v 3.1.1.0) in your environment and we will review quickly what can we offer this solution.
Runecast?
Runecast is a company founded in 2014 more recognizable because the CEO is Stanimir Markov which is VCDX #74 but in his team has other virtualization veterans who help them to create this solution.
It’s a solution made by and for IT Admins which will scan your VMware environment (vSphere, vSAN, and NSX-T and V) and inform you about issues, best practices, hardware compatibility and apply security hardening in your VMware environment.
With all of this information it will save a great amount of time to any IT admin in order to resolve or identify a known (or not) issue, perform an upgrade of any new release of vSphere, apply the correct configurations according any Security standards (PCI-DSS, HIPAA, DISA SITG, etc.) and more…
The main functionalities of this application are:
I will do another post showing and explaining in detail these features, meanwhile, you can check each one on their website.
Use it in your environment or try it in a demonstration
If you want to install and configure this virtual appliance to deploy in your environment, go to https://www.runecast.com/quick-and-secure-deployment and in the upper-right menu click the Free trial button.
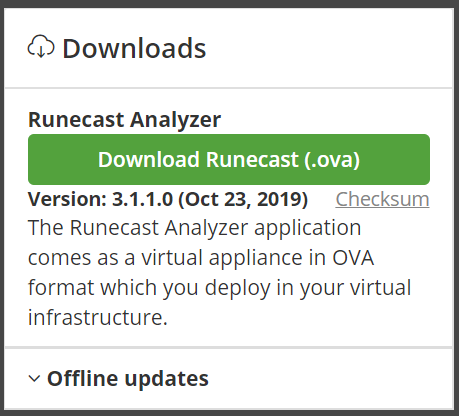
You will need to create an account (it’s free) but once you created it, you will have access to the OVA file by downloading it:
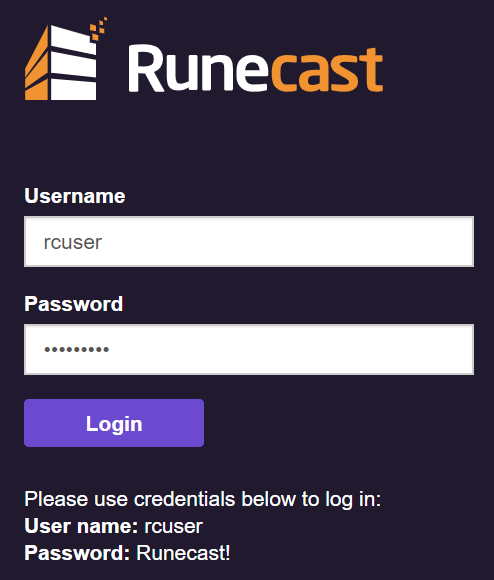
Runecast has also a Live Demo where you can try all the features without installing anything, just go to the website: https://demo.runecast.com and login with the credentials provided.
You will see immediately a test environment where you can check all the features that it has in just seconds, quite handy if you want to test this solution quickly.
Deploy and configure
Once you download the OVA file, deploy it in your virtual environment like what you will do with other virtual appliances:
- Right-click in your DC and «Deploy OVF Template…»
- Select the OVA file you downloaded in the previous section.
- Select name, folder, compute resource
- Accept the EULA, choose the deployment configuration (in my case Small)
- Configure the resources necessary for the appliance (storage, network and finally all the networking properties).
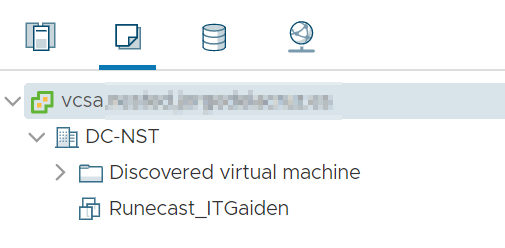
Once the OVF package has been imported (it took 2 min approximately), it will appear a VM in your vCenter:
Now, power on the VM and check in the VM console which is the IP that you give to the application in order to access the appliance (https://192.168.1.81):

The first time you access through the website, you must use the following credentials (the same as in the Live Demo):
Now, it will ask you some information to connect to your vCenter, just enter the information (I created a new user to connect to the vCenter) and click Continue: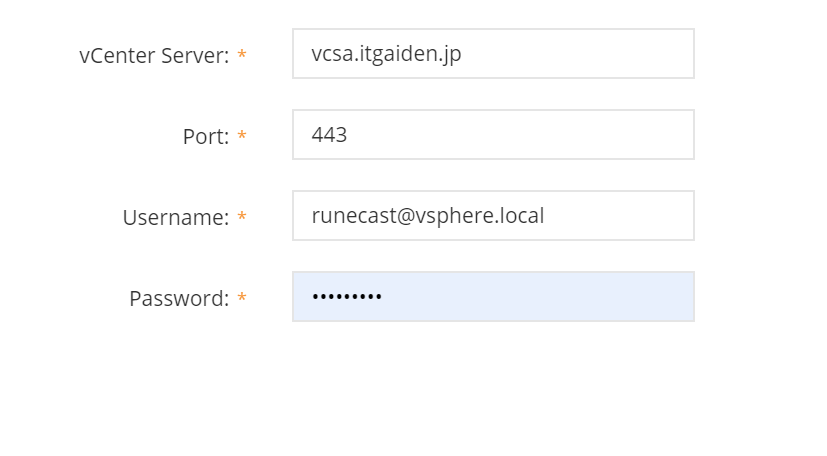
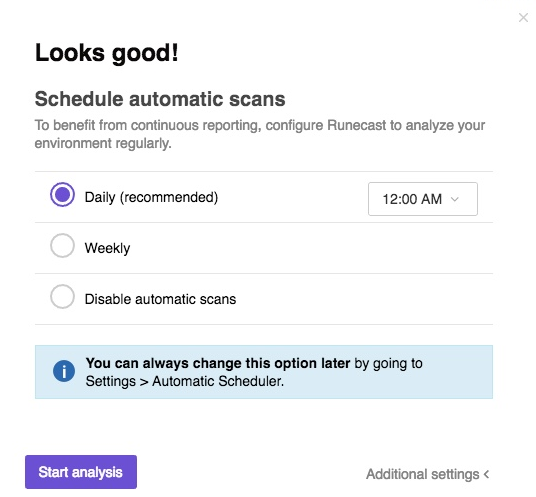
And provide a schedule, I let the default setting as it’s a reasonable schedule. Continue by selecting «Start analysis»:
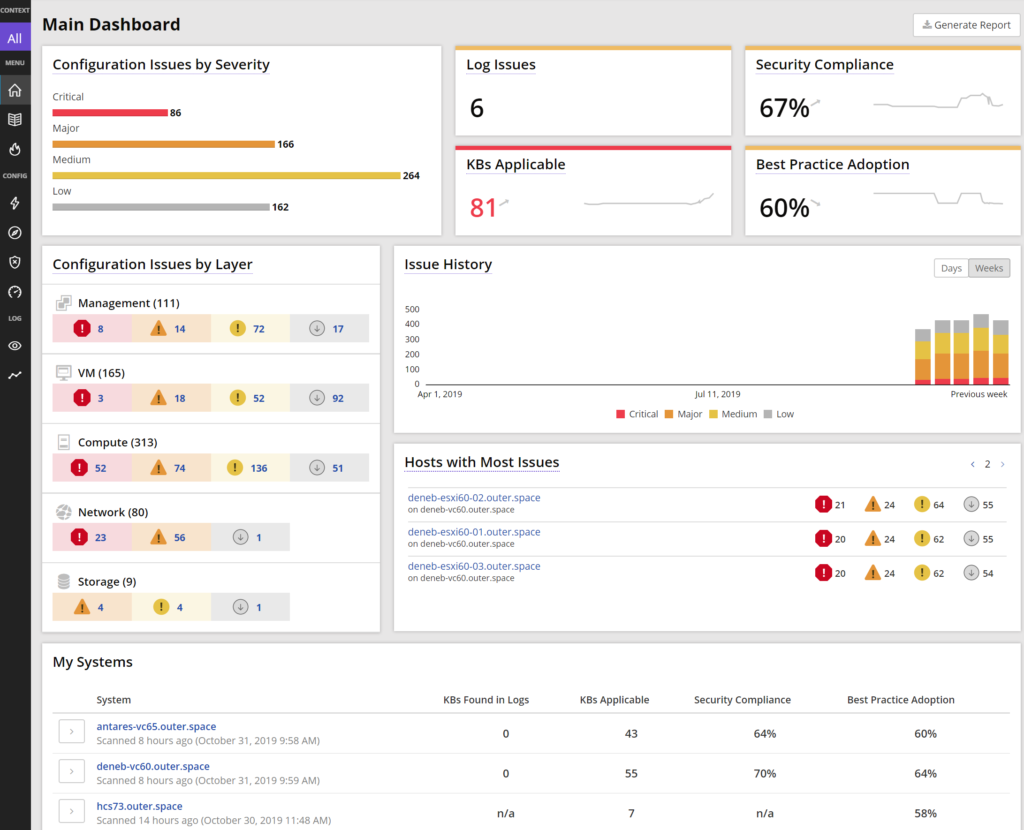
This, will scan your VMware environment and let you know in the dashboard all kind of issues, configuration, etc.:
Features
Here I’ll show you some screenshots from the solution and how they look:
- Security Hardening
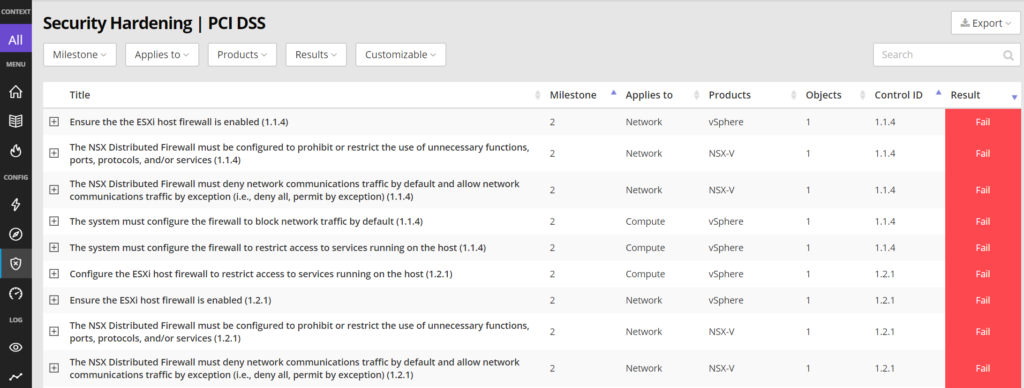
It matches the security standard that you select to your environment and let you know which configuration you must apply in order to be compliant with that security standard.
- Best Practices
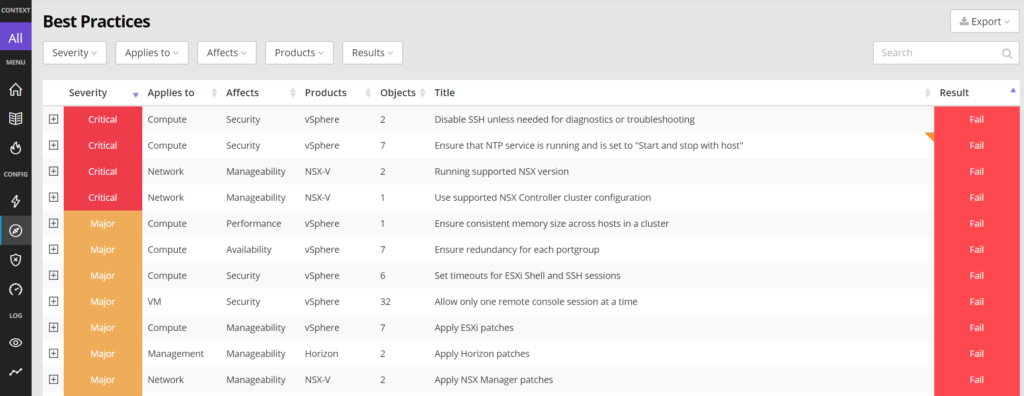
Guides you about which Best Practices can be configured in your VMware environment against the VMware Best Practices.
- Config KBs Discovered
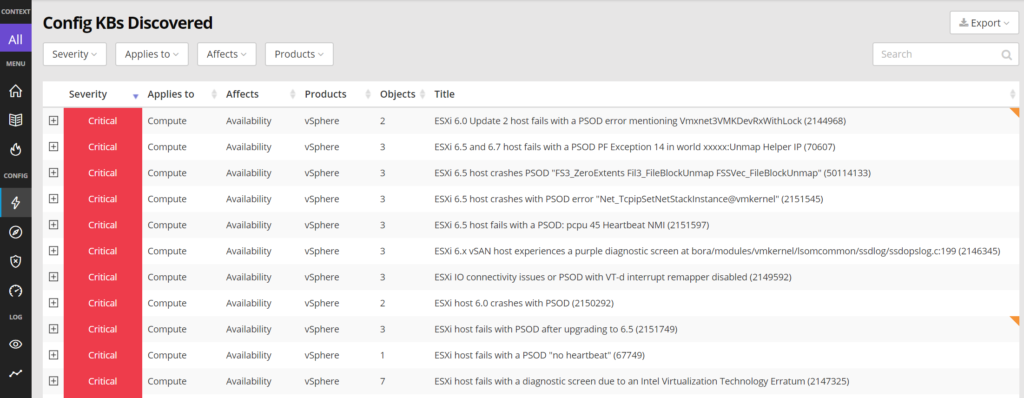
One of the most pro-active features is Config KBs Discovered, it lets you know which configurations you have currently applied in your environment and the KBs that are published in the VMware DB.
- Hardware Compatibility
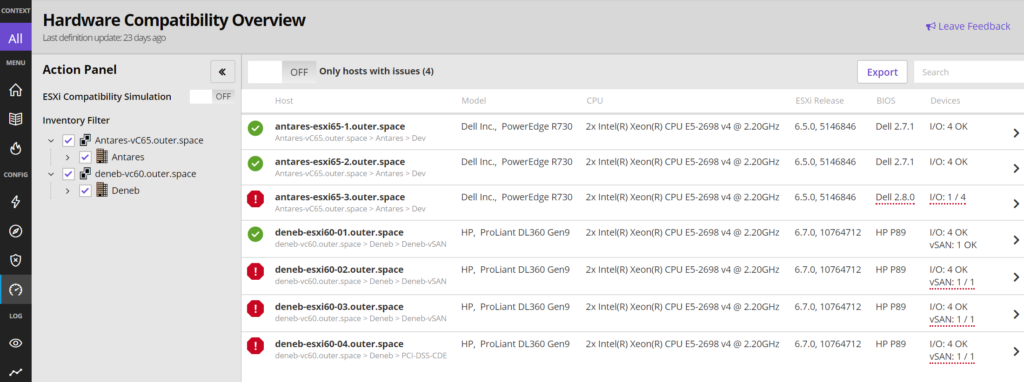
This feature will help you to deal with any kind of upgrades in just seconds, do you know if your hardware is listed in the Hardware Compatibility List for some product? It will give you all the information in just a moment.
- Log Inspector
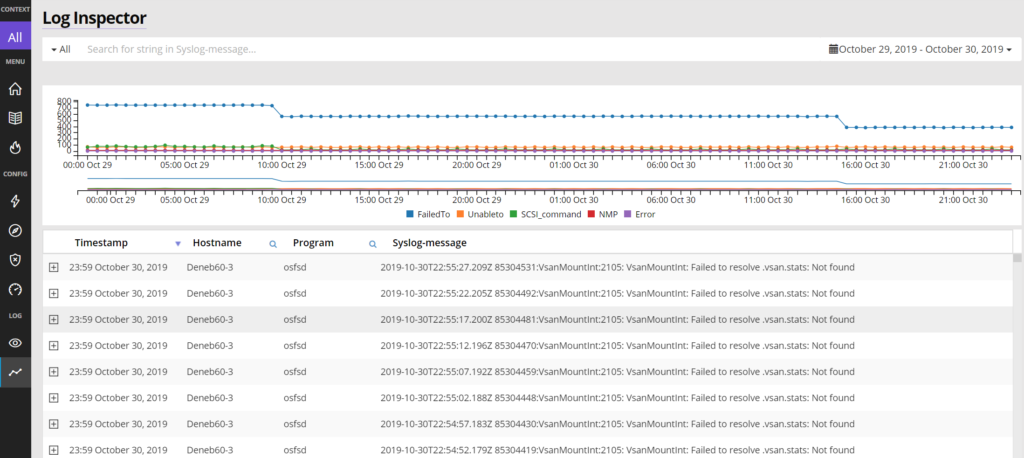
Log inspector will look for patterns in your ESXi logs in real-time in order to analyze and provide a solution before anything happens.
What a better way to apply a fix for something that you didn’t even notice?
And that would be all for this quick post about Runecast Analyzer and how can it help in a VMware environment for vSphere, vSAN, and NSX.
If you thought that Runecast Analyzer is a single-use tool, you’re wrong, it has many features that make it easier to manage a VMware environment in a daily-basis.
Remember that you can try it for 30-days with all the features or use the live demo on their website.