Let’s start with part 3 in the cloning virtual machines in vSphere series, I am going to talk about another type of clones, linked clones!
All articles regarding cloning virtual machines in vSphere series:
Part 1: Types of clone
Part 2: Full Clone
Part 4: Instant Clones (not published yet)
As said in previous articles, this series is only focused on VMware vSphere hence, VMware Horizon View is not contemplated (Linked clones are commonly used in that product).
What is a linked clone?
What can you see here?

In the previous image, you can see 3 different characters but they share something in common…the actor!
Linked clones are the same! A linked clone is a type of clone (a copy of a virtual machine) where the parent VM shares virtual disks with their clones.
The resulting linked clone will be created from the parent’s VM snapshot and because of being a snapshot, it will have the same state that was the snapshot was taken.
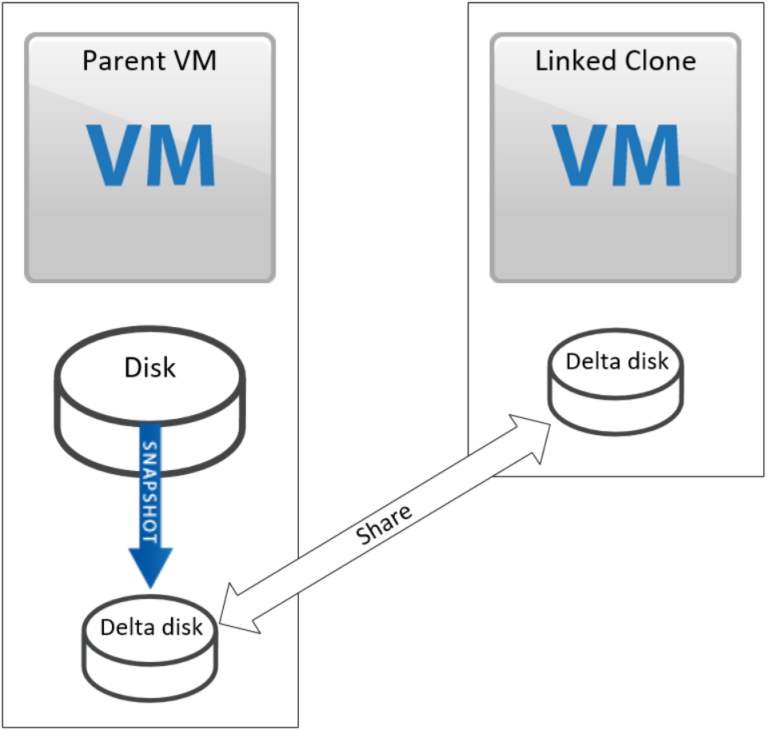
When the linked clone is created, it shares his own virtual disk (.vmdk file) with the snapshot from the parent VM, this leads to some unique features:
- The clone will be dependent from the parent VM because they are sharing their virtual disks. If you delete the parent’s VM snapshot, it will corrupt the clone’s virtual disk.
- Even both VMs are sharing their storage, any changes performed in the clone won’t affect the parent VM and vice-versa.
- The linked clone will have the exact same data as the source VM because it was created from a snapshot.
- The save spacings are obvious because the clone will only write the new modifications in its own virtual disk. So, the clone’s virtual disk size will be only the amount of data that changed after it was created!
General process
- Use or prepare a VM (Parent VM) that will be used as a master/parent to deploy the linked clones
- Power-off the Parent VM (Recommended but not mandatory)
- Perform a snapshot of the VM.
- Time to create Linked clones referencing the snapshot we created previously.
- Power-on the clones and customize them (apply customization specifications for example).
- (Extra) Before powering-on the linked clone, perform another snapshot of the clone to use it as a rollback (if the end-user needs it).
- (Extra) Power-on the clone and is ready to be delivered.
- (Extra plus) If you decide to keep the linked clone for any reason, you can perform a full clone of it and it will become an independent VM!
In the next section, I will show you how to create a linked clone with PowerCLI from a Windows VM and in my case, I will use Custom Specifications within the script to launch the clone.
Lab time!
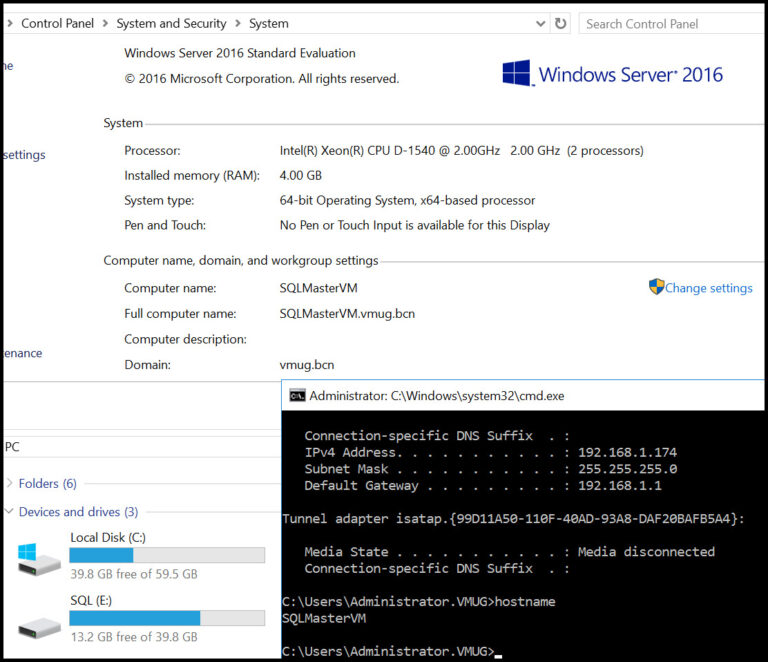
Here we have the VM that we’re going to use as our Parent VM:
– Name: SQLMasterVM
– IP: 192.168.1.174
– Disk allocation: Around 35 GB summing both disks.
– Domain: vmug.bcn
Inside the Guest OS:
Space allocated in DS:

What are we going to do?
- Shutdown the master image VM that hosts some DBs.
- Create a snapshot when the VM is powered-off to ensure that is consistent (this is a VM with a SQL installed so, even more recommended)
- Perform the linked-clone via PowerCLI.
- Start the VM (We aren’t going to do the extra step of creating a snapshot of the clone) and use custom specifications to fully customize the clone.
All of this will be performed by this simple script:
[powershell]
##Creating SQL Linked Clone from a Parent VM "SQLMasterVM"
#variables
$OSSpec = Get-OSCustomizationSpec -Name ‘Win-SQL’
$BaseVM = "SQLMasterVM"
$LinkedVM = "SQL-LC1"
# Delete snapshots on the Parent VM
Get-Snapshot -VM $BaseVM | Remove-Snapshot -Confirm:$falseStart-Sleep -Seconds 2
#Create snapshot
New-Snapshot -VM $BaseVM -Name "Linked-Snapshot" -Description "Snapshot for linked clones for $LinkedVM"
#Gather information of the created snapshot
$snapshotParent = Get-Snapshot -VM $BaseVM | Select Name
$snapshotParent = $snapshotParent.Name
Start-Sleep -Seconds 5
#Create Linked Clone referencing snapshot and start the VM.
New-VM -Name $LinkedVM -VM $BaseVM -Datastore "VMS" -ResourcePool (Get-Cluster -Name Gaiden-Cluster | Get-ResourcePool) -OSCustomizationSpec $OSSpec -LinkedClone -ReferenceSnapshot $snapshotParent -DiskStorageFormat Thin
Start-VM -VM $LinkedVM
[/powershell]
In this script, I am also using the OSCustomizationSpec parameter, while using the sentence to create the linked clone, to change the IP, name and join again to the domain the resultant clone. Also, I am changing the SQL instance name in my case because it’s a server with MSSQL server installed.
Once the script finished, a new linked clone is created and powered on with the name «SQL-LC1».
We can see the amount of time that takes to create a Linked clone (5 seconds):
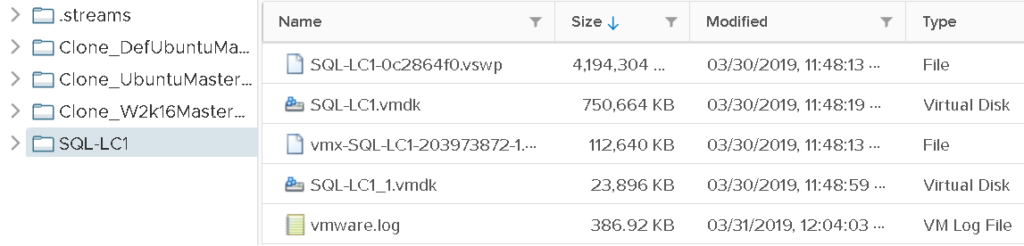
And now look at the storage allocated by the Linked clone (powered off), 750 MB approximately:
After the Linked clone is created and powered on, you can do whatever you want.
I had to wait some minutes (around 10 min. in my case) until the OS customization specification finish all the actions specified (power on the VM, join to the domain, reboot the VM, execute a script to update SQL instance, etc.)
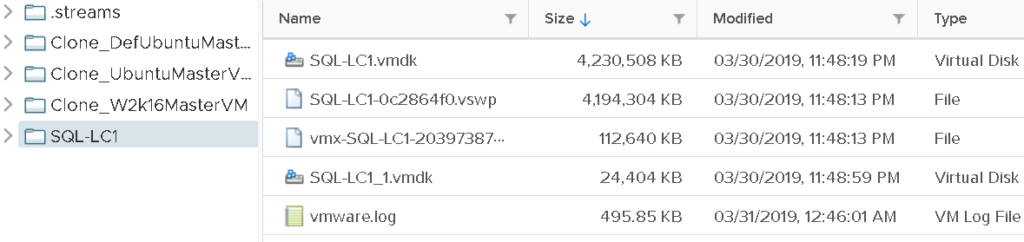
Here is the «real» space allocated after the Linked clone has booted up and I logged in with a user, around 4 GB:
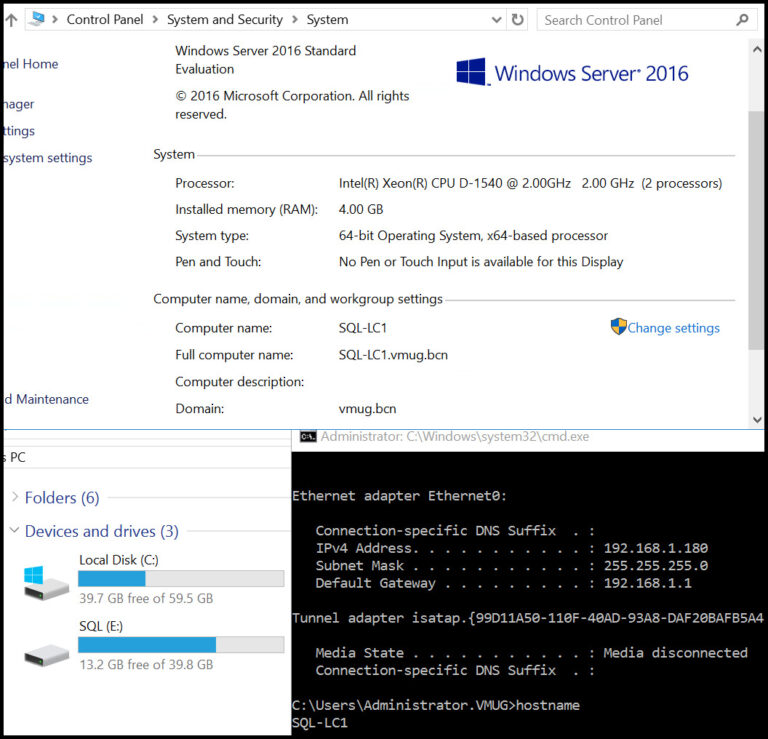
A look inside the Guest OS of the linked clone (new hostname, IP and has the same storage as the Parent VM:
Use cases
It’s commonly used in VDI and DEV environments but here are some examples:
- Desktop Deployment
- QA
- Bug testing
- DB server testing
- File server testing
- General testing
Benefits and limits
Let’s summarize which are the benefits and limits that we can find in linked clones:
Pros
- Superfast cloning compared to a Full/Normal clone, it takes seconds instead of minutes to clone large VMs.
- Space savings due to changes are stored in a separate disk (clone’s flat disk).
- Useful for development environments or if you want to keep the clone just, perform a full clone of it!
- Deploy as many linked clones as you want, they will reference the snapshot in the Parent VM hence, there is no disk chain on that (except for the snapshot you created of course) and the benefits of replicating.
- Ongoing changes made in the virtual disk of the source VM don’t affect the linked clones and changes to the disk of the linked don’t affect the parent.
- It can be performed with the parent VM powered on but, it will have some performance degradation and probably inconsistent data (if for example, the parent VM hosts a DB).
Cons
- Recommended but not mandatory that the parent VM has to be powered off.
- There is a storage/disk dependency as the linked clone is created from the parent’s VM snapshot then, if you delete that snapshot, inconsistencies will occur in the clone (and at the end you will delete it).
- Performance on the destination clone will be impacted (as virtual machines are sharing storage)
To conclude
Linked clones have multiple benefits compared to full clones and it has many use cases as we saw before.
You can easily replicate the status of a VM (snapshot) and deploy linked clones to your end-users with all the benefits as for example space savings or the deployment speed.
To end this series, we will look at instant clones, another type of clone that is even faster than linked clones but, with some particularities.